Friday, January 26, 2007
Day 7
I spent an hour removing some of the mechanical assemblies from below the playfield to make room for the lights and to sell them off and make back a little of my expenses on the project. The digital displays sold on Ebay for $47.76 and the guy also needed two flipper assemblies, so I sold them for $10 plus shipping. So factoring in the money I made back selling the recent parts, I'm down to only investing $50.24 in this project. Sweet! It would rock if the rest of the parts would sell for $50 so this doesn't cost me anything. I currently have the slingshot assemblies, outhole kickers and two remaining flipper assemblies on Ebay: http://search.ebay.com/_W0QQsassZtenthingsQQhtZ-1
Monday, January 22, 2007
Day 6
It's been a while since I reported on the progress of the project. I ordered two sets of battery operated "wide angle LED lights" from Creative Energy Industries. The arrived in less than a week and I think they are going to work great. I sold the pinball backbox and backglass to a local pin collector who runs the Washington Pinball Coalition list-serve. He once had a Time 2000 and loved the artwork, even though the game was boring. He is going to wire and light the backbox and hang it on his wall to show off the cool pinball artwork, something I considered doing as well before he contacted me. He had another old Atari pinball table, a very cool looking Star Rider, and he let me test the display units from mine on his to see if they worked. They did, so I have them currently up on Ebay and hope to both make some money back and help out someone else's Atari pinball project. I also found someone looking for the flipper solenoids for and Atari Superman, so I need to do a little research and find out if they are the same, if so I'll sell those to him as well. The good part about this project is I'm helping a few other people out completing their games with the usable parts I have leftover.
Expenses so far:
-$100 for the half gutted machine
-$38 for the lights
+$30 for selling the backbox and backglass
-------------------------------------------
Total spent on project: $108
Expenses so far:
-$100 for the half gutted machine
-$38 for the lights
+$30 for selling the backbox and backglass
-------------------------------------------
Total spent on project: $108
Thursday, January 11, 2007
Day 5
I read an online forum discussion about LEDs and got a great suggestion. If the LEDs seem too bright or focus their light too much one direction, to try sanding them lightly to scuff the surface. Someone did it with a dremel set up on 200 bulbs and said it the diffused the light dispersement quite well and gave it a "warm" feel. I'm definitely going to consider doing this, I want it to light the artwork well but not seem too bright. I'll probably experiment around with it when the lights arrive in the mail and see what works best. A few other ideas that have been bouncing around in my head:
- wiring the power switches from the battery packs to the flipper button or credit buttons
- putting in some type of electronic chimes or a recording to simulate pinball sounds in that can be played at the press of a button
- putting pinballs in the two sunken ball kickers on the playfield
- cutting out shelves for magazine storage in the sides of the table
- repainting the coin door, then having it open with a key to a storage area
- possibly adding a pull out drawer for storage (this is a wide-body pin, it's got lots of storage space to take advantage of)
Day 4
After a lot of consideration on how much wiring would be involved to use the existing wiring and lights, as well as how much power that would take, I've decided to opt for using battery powered LEDs. LEDs use 80-90% less power, so in battery mode I could light the entire playfield for many hours and just a few rechargable AAs. I spent a few hours researching LEDs and all the possibilities and prices. I ordered two sets of 20 white wide angle Christmas LED strings. I plan to glue gun them into the GI playfield holes and light some of the special colored lights under the playfield as well. Each set will run on it's own double A battery pack... in the end I will probably add more lights and try to power them all through one larger battery and switch set up.
Now the question remains how many of the various colored special lit areas on the playfield should I light and how to do it. I will probably light a few with the Christmas lights for their colored effects. I found blinking LEDs on a few electronic websites, I'm thinking about swapping out a few bulbs on the Christmas light strings and see if the blinking LEDs would run on it. This would be ideal, it would be the easiest way to wire and power strategically placed blinking lights under stuff like "extra ball when lit."
I've also been toying with buying two simple electronic kits of chasing LED lights like this:
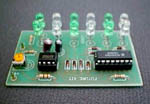
These come unassembled for under $10. I could modify them during assembly by placing the LEDs on 12" wires instead of directly on the boards. Then I'd wire the blubs under the two clocks made of colored numbered plastic pieces on the playfield. The result would be the clocks would be lit by an ever spinning circle of lights and have a pretty cool effect. This is just an idea I'm brainstorming, I wouldn't do this until I have the main lighting done and the contstruction side of the table completed.
Now the question remains how many of the various colored special lit areas on the playfield should I light and how to do it. I will probably light a few with the Christmas lights for their colored effects. I found blinking LEDs on a few electronic websites, I'm thinking about swapping out a few bulbs on the Christmas light strings and see if the blinking LEDs would run on it. This would be ideal, it would be the easiest way to wire and power strategically placed blinking lights under stuff like "extra ball when lit."
I've also been toying with buying two simple electronic kits of chasing LED lights like this:
These come unassembled for under $10. I could modify them during assembly by placing the LEDs on 12" wires instead of directly on the boards. Then I'd wire the blubs under the two clocks made of colored numbered plastic pieces on the playfield. The result would be the clocks would be lit by an ever spinning circle of lights and have a pretty cool effect. This is just an idea I'm brainstorming, I wouldn't do this until I have the main lighting done and the contstruction side of the table completed.
Day 3
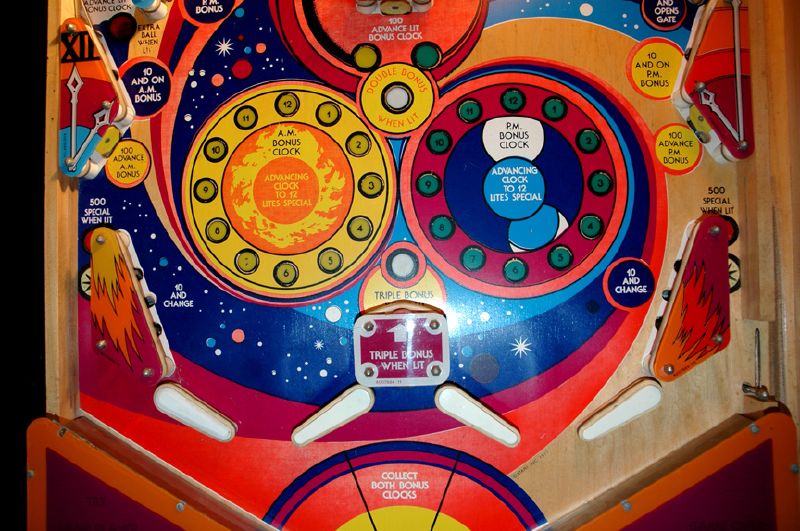
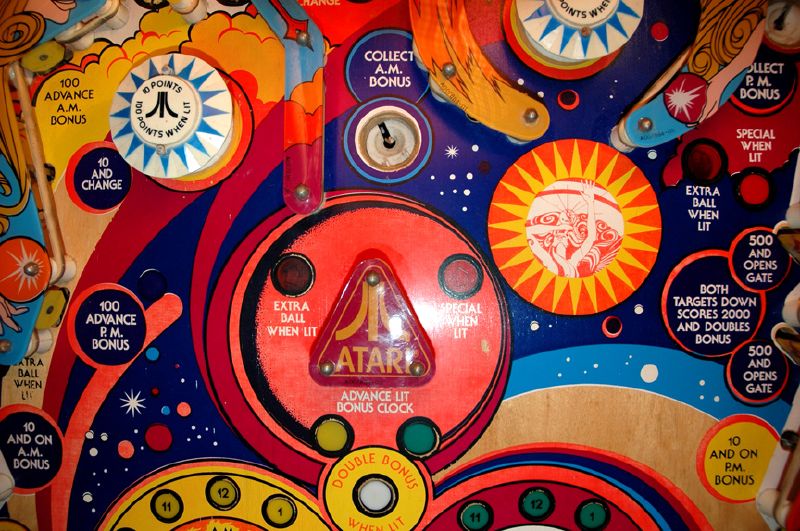
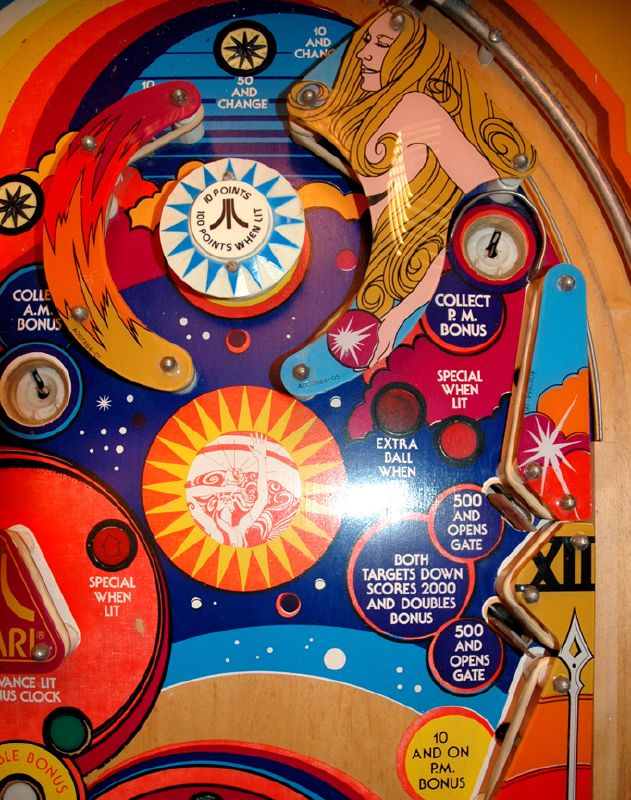
I took a few photos of the artwork on the playfield of the Atari Time 2000. It's really got some bright colorful artwork. It's got bright colors and symbols to give the feeling of time and space, but doesn't have any scene or comic style artwork to focus on, which I kinda like. Here are a few pictures, click on them to get a bigger version:
Day 2
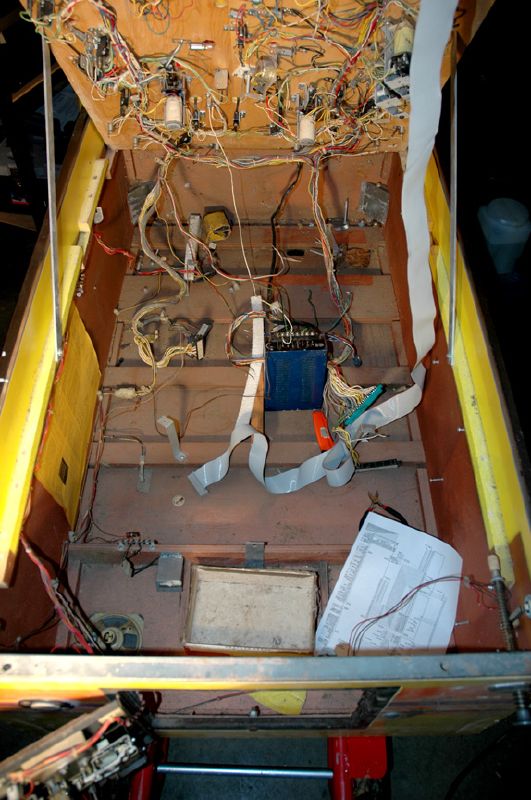 I spent a few hours inside the pin Sunday and Monday nights. This is a widebody pin, so this is going to be a big coffee table! As you can see in the photo, it's mostly gutted inside, but all the wiring on the playfield and most of the wiring harness is still present. That blue box is a video game power supply I wired into the cord and tried to tap into the GI lights. GI=general illumination, the plain white lights throughout a pinball playfield, usually located under the plastic playfield artwork and used to light up the playfield. Ideally this coffee table will be mostly lit up at the flip of a switch to showcase the pinball artwork.
First I just tried messing around, tapping into the GI lights with 5 volts from the power supply. Most pins will have all these lights tied together by two wires running around to all of them, so it should be easy to light the whole string. It would be just my luck Atari didn't do this, they seem to be grouped in sets of 3 or 4. So I've already come to the first decision point in the project, how to wire the lighting? Do I run 15 different wires from the power supply into the harness to light all the GI lights? That seems like a lot of work and something that would never be able to run off a battery, which would be desirable at times when I don't want' people to trip over a cord.
Day 1
I finally picked up a suitable candidate to make a pinball coffee table with, so this blog will serve to document the proccess of the project and provide a forum for input and advice for anyone that's interested.
I'm pretty excited about this project. Every since Shorty's opened up in Seattle maybe a decade ago with tables made from old pinball playfields I've been wanting to do something similar for my home. Then last year Roya's boyfriend Greg did one and put a web page up on the project, that helped serve as inspiration. He just used an old playfield and built a table for it and it turned out awesome, check it out on the Instructables website.
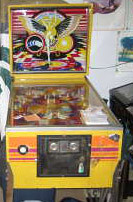
I've been keeping my eyes out for a cheap pinball playfield or full game that wasn't worth saving. Last Saturday I spotted a $100 Atari Time 2000 pinball table project on Craigslist. It was in good shape, but missing all it's game boards. Atari only made about 10 pins in the late '70s and early '80s. The games were considered not very good to play, hard to keep alive electronically (they put the game boards under the playfield where dust and bits of metal from the playfield could drop on them and short them out), but they did have pretty good artwork. I got the machine on Sunday and thought the artwork was great! It has bright colors and was in really good shape. Such good shape that I had to reconsider making it into a table. The dilemna for pinball and arcade game collectors like me is we never want to part out or destroy an old game, hell we will spend countles hours and too much money converting crappy Jamma games in classic game cabinets back to their original game in all it's glory. Saving one more game from the scrap heap and preserving the golden era of gaming! So I searched the web and pin newsgroups for Atari game boards and reviews of the table. Time 2000 wasn't a liked game, it has two sets of flippers and was thought to be really boring to play. And it turned out Atari game boards were pretty much impossible to find... and even if I did find them and restore the game, it would be worth $300 tops and I'd sink a lot more into getting it running. That cemented the deal for me, this was the perfect candidate for my pinball coffee table project!
Subscribe to:
Posts (Atom)